
Make Your Own TARDIS Business-Card Holder
What I love about geeky crafting is it invades all fandoms and crafting styles. Sewing, knitting, embroidery, and even bringing back some crafts that were lost. Plastic canvas seemed like a lost craft to me. I grew up with my mom making the best Barbie furniture for my sister and me to play with out of plastic canvas. I tried my hand at it a few times as a kid, but it wasn’t until recently that I started doing it seriously again.
One of my first projects was making a business-card holder. I had just gotten business cards from work and wanted something I could use for them—something that would reflect my geekiness. I settled on making the TARDIS from Doctor Who.
Things you’ll need:
- One sheet of clear # 7 plastic canvas, stiff
- Yarn needle
- Blue yarn (TARDIS blue, if you can find it)
- White yarn
- Black yarn
- Iridescent yarn (optional)
- Black embroidery thread (optional)
- Scissors
The nice part about plastic canvas is you don’t need nice yarn. Just about any yarn will do. Acrylic works very well; just make sure it’s not too rough.
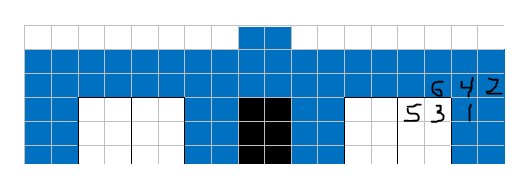
This pattern uses the tent stitch and the overcast stitch. The tent stitch is shown below. Start with your needle coming up at the 1 and down at the 2, up on 3, down on 4. When you start a new piece of yarn, pull it through your first hole and leave about an inch. As you stitch, keep the yarn over the extra to anchor the yarn.

When you hit the end of the row, start moving the opposite way. Now your odd stitches will be on the bottom and your even on top. The back should look similar to your front. When you’re done with your piece of yarn, pull it through about 4 or 5 stitches on the back to anchor it.
The overcast stitch here is similar to the overcast stitch in sewing; it simply loops around the canvas. It is also good for attaching pieces of canvas together.

Cut your canvas into 2 pieces, one 18 by 26, the other 18 by 26, with an extra square on top of the ninth column. This will be the top of the TARDIS.
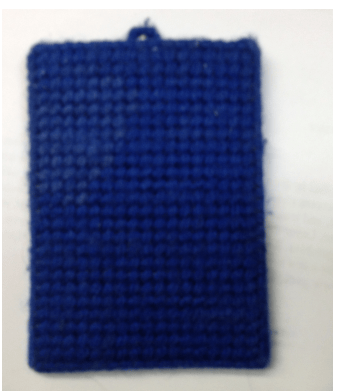
Use the tent stitch and blue yarn on the back to make a solid blue rectangle. When you done, it will look a bit like this:
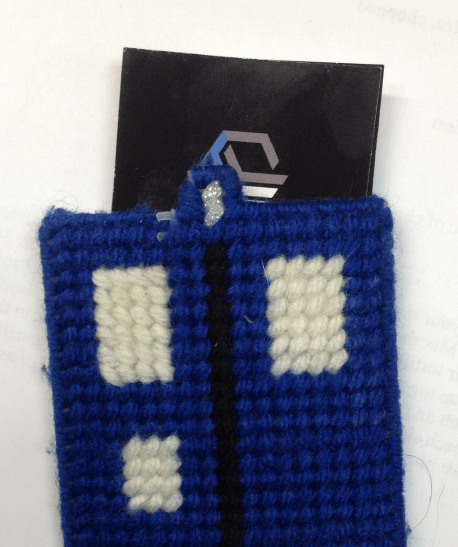
Now take the front with the square on top and make the windows with the white yarn using the tent stitch. The windows start 2 rows down and 2 columns in from the sides. They are 4 stitches wide and 6 rows long. The police box sign is next, it is 4 boxes in from the side and 4 boxes down from the window. It is 3 stitches across and 4 rows down.
Next is the door; it is one long column in the middle. Take your black yarn and make a tent stitch vertically, going from the bottom all the way up to the second to last box. Take your iridescent yarn (or white) and make 2 stitches right on top in the extra box and 1 just below that. Leave plenty of extra, as you’ll need to anchor it to the blue when you’re finished. Now take your blue yarn and fill in the rest of the canvas using the tent stitch.
When you’re done it will look a bit like this:


Now use the overcast stitch on the sides and bottom to put the pieces together and then each top separately to leave an opening.
When you’re done, add business cards!

Follow @TwinCitiesGeeks on Twitter or Like Twin Cities Geek on Facebook for more great stuff from Minnesota geeks in your feed!
About the Author

Hertzey Hertz
Hertzey is a native Minnesotan currently living in St. Paul. She grew up learning the best of both worlds: the world of geek, watching science fiction and fantasy and gaming with her dad, and world of the kitchen and creative arts, cooking and crafting with her mom.


This is fabulous! Flash this as you pull out your business card and the person you’re connecting with will know exactly how high your geek-flag flies. I can’t wait to give it a try!